



Quick Answer
Thermoplastic road marking paint is applied by heating the material to its recommended melting temperature, preparing a clean and dry pavement, applying primer when required, laying the molten material with a screed or spray machine, immediately dropping glass beads, and allowing the marking to cool before opening to traffic.
The quality of the finished marking depends not only on the paint itself, but also on melting temperature, pavement condition, application thickness, glass bead embedment, and construction technique.
Standard Thermoplastic Road Marking Process
Surface Inspection → Surface Cleaning → Primer (if required) → Heat Thermoplastic → Apply Marking → Drop-on Glass Beads → Cooling → Inspection
Step 1. Inspect the Pavement
A clean, dry pavement is a basic requirement for good adhesion.
Do not apply thermoplastic over wet or contaminated pavement.
Remove oil contamination completely before marking.
Step 2. Setting Out
Accurate setting out determines the final position and appearance of the road marking.
Layout errors cannot be corrected by improving application quality.
Setting Out Requirements
Before application:
- Confirm the construction drawings.
- Measure the marking position.
- Establish guidelines.
- Verify line width and spacing.
- Mark arrows, symbols, and pedestrian crossings.
Construction Precautions
- Recheck dimensions before application.
- Do not rely on old markings if the design has changed.
- Correct layout errors before primer or thermoplastic is applied.
Step 3. Apply Primer (When Necessary)
Primer is not required on every project.
Asphalt Pavement
Normally, no primer is required unless the pavement is aged or polished.
Concrete Pavement
Primer should always be applied before thermoplastic.

Concrete has a dense surface with lower bonding ability than asphalt. Primer improves adhesion and reduces the risk of peeling.
Wait until the primer is completely dry before marking.
Never apply thermoplastic over wet primer.
This may trap solvent, causing bubbles or pinholes during heating. If you want to know more about that can refer to our article " Why Thermoplastic Road Marking Paint Bubbles: Causes and Solutions "
Step 4. Heat and Melt the Thermoplastic Material
Melting Directly Affects Application Performance
Once the thermoplastic formulation has been determined, application performance depends largely on the melting process.
The objective of melting is to obtain a uniform and stable melt viscosity, not simply to reach a target temperature. Proper viscosity ensures smooth flow, uniform thickness, clean edges, and good glass bead retention.
Melting Guidelines
- Heat the material according to the manufacturer's recommended application temperature.
- Stir continuously until the material is completely melted.
- Heat evenly and avoid localized overheating.
- Do not hold molten material at high temperature for an extended period.
- Do not mix different thermoplastic formulations in the same kettle.
Common Problems During Melting
| Improper Melting | Result |
|---|---|
| Incomplete melting | Poor flow and rough surface |
| Excessive temperature | Resin degradation and discoloration |
| Long holding time | Material aging and unstable viscosity |
| Insufficient stirring | Uneven composition and inconsistent application |
| Mixing different formulations | Unstable melting behavior and inconsistent performance |
Key Insight: Melting is the longest and most energy-intensive stage of thermoplastic road marking construction. Therefore, controlling the melting process is essential for both application quality and construction efficiency.
Step 5. Apply the Thermoplastic Marking
Two application methods are most commonly used.
Screed Application
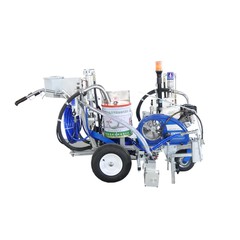
Screed application is using a hot melt cart for construction and uses a screed box to control the thickness of molten thermoplastic.
Advantages:
- Uniform thickness
- Straight edges
- Suitable for highways
- Most common application method
Spray Application
Spray application atomizes molten thermoplastic through a spray gun.
Advantages:
- Faster application
- Suitable for long-distance highways
- Smooth surface finish
- Spray systems usually require better control of temperature and viscosity than screed application.
Common Construction Mistakes
| Problem | Possible Cause | Solution |
|---|---|---|
| Peeling | Dirty surface or missing primer | Clean the pavement and apply primer where required |
| Bubbling | Moisture or wet primer | Ensure the pavement and primer are completely dry |
| Flowing edges | Material too hot or viscosity too low | Reduce the heating temperature |
| Drag marks | Viscosity too high | Heat evenly and maintain the correct temperature |
| Poor night visibility | Incorrect bead embedment | Apply beads immediately and control embedment depth |
| Uneven thickness | Improper machine adjustment | Calibrate the screed box before construction |
Expert Tips from MATESTAR
Experienced workers pay close attention to three details that are often overlooked:
Control viscosity, not just temperature. The same temperature can produce different viscosities depending on the formulation.
Do not leave molten material in the preheater for long periods. Extended heating accelerates resin aging and affects application quality.
Check glass bead embedment immediately after application. If beads sink too deeply or remain mostly exposed, adjust the material temperature or bead application rate before continuing.


